I’m a huge fan of Windows Subsystem for Linux (WSL), especially WSL2 which uses a virtualisation layer to bring increased performance and compatibility to WSL. However, one of the few downsides of WSL2 is that it uses a virtual disk (VHDX) to store the filesystem. This means you can end up in a situation where your virtual disk is taking up 100GB, but WSL2 only needs 15GB… which is exactly what happened to me today!
Long story short, I saved a backup in the wrong directory, and my WSL2 disk expanded to use up all available space on my drive. I went looking for a way to shrink a WSL2 virtual disk, and after a few false starts, found a method which worked for me. Hopefully it’ll help you out too!
Before you begin
Before shrinking a WSL2 virtual disk, you need to ensure that WSL2 is not running.
You can check if it’s running with the command ‘wsl.exe --list --verbose‘ in PowerShell:
PS C:\Users\valorin> wsl.exe --list --verbose
  NAME            STATE           VERSION
* WLinux          Running         2
  Debian          Stopped         2
  Ubuntu-18.04    Stopped         2
  kali-linux      Stopped         2
It should stop when it’s idle, or you can encourage it to stop with the ‘wsl.exe --terminate‘ command:
PS C:\Users\valorin> wsl.exe --terminate WLinux
I also highly recommend you take a backup of your WSL2 installation.
These instructions worked for me, but you could have a different environment that may result in corrupted data. So please, take a backup first!
Use diskpart to Shrink a WSL2 Virtual Disk
I discovered you can use the ‘diskpart‘ tool to compact a VHDX. This allows you to shrink a WSL2 virtual disk file, reclaiming disk space. It appeared to work for me without any data corruption, taking the file size down from 100GB to 15GB. Your results may vary though.
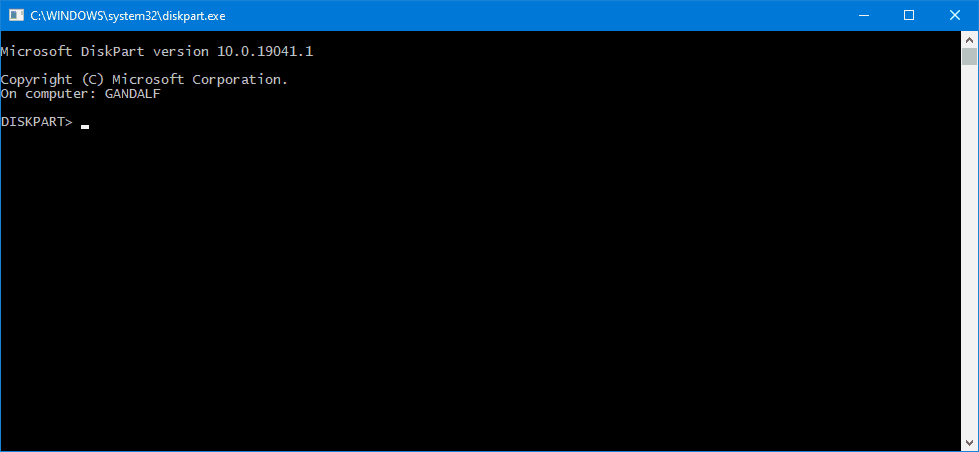
You can launch the diskpart tool in PowerShell:
PS C:\Users\valorin> diskpart
It will open up a new window:
Once that has opened, you need to specify the path to your VHDX file.
If you don’t know this path, you can find by first locating the package directory for your WSL2 instance, which lives in: C:\Users\valorin\AppData\Local\Packages\. Look for the vendor name, such as WhitewaterFoundryLtd.Co for Pengwin, CanonicalGroupLimited for Ubuntu, or TheDebianProject for Debian. Once you’ve identified the folder, you’ll find the VHDX in the LocalState subdirectory.
For me, this path is:C:\Users\valorin\AppData\Local\Packages\WhitewaterFoundryLtd.Co.16571368D6CFF_kd...\LocalState\ext4.vhdx
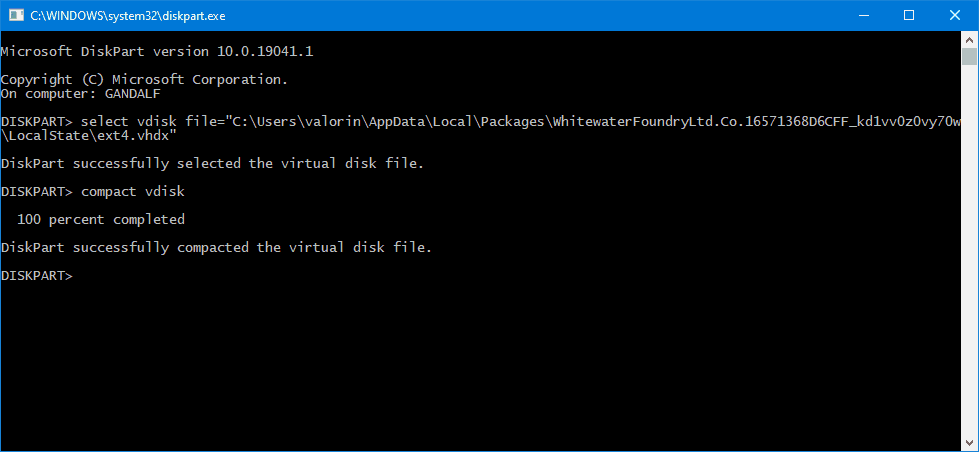
With the full path to the VHDX, you can select it within diskpart:
DISKPART> select vdisk file="C:\Users\valorin\AppData\Local\Packages\WhitewaterFoundryLtd.Co.16571368D6CFF_kd...\LocalState\ext4.vhdx"

DiskPart successfully selected the virtual disk file.
Once it’s selected, you can ask diskpart to compact it:
DISKPART> compact vdisk

  100 percent completed

DiskPart successfully compacted the virtual disk file.
Once that has finished, you can close diskpart.
If you check your VHDX now, you should see it has reduced in size. It depends how much empty space was being used by WSL2 as to how big a space reduction there will be. In my case, it was quite significant:
Before
Mode                 LastWriteTime         Length Name
----                 -------------         ------ ----
d-----         9/02/2020  12:04 PM                temp
-a----         9/02/2020   1:04 PM    94778687488 ext4.vhdx
-a----        29/07/2019   3:48 PM              0 fsserver
After
Mode                 LastWriteTime         Length Name
----                 -------------         ------ ----
d-----         9/02/2020  12:04 PM                temp
-a----         9/02/2020   1:04 PM    14533263360 ext4.vhdx
-a----        29/07/2019   3:48 PM              0 fsserver
I hope you found this useful. ?
Please let me know if you have an alternate way to shrink a WSL2 virtual disk – especially if it’s safer than this approach.
50 replies on “How to Shrink a WSL2 Virtual Disk”
Did you find a way to do this on a schedule?
just put the in the flle scriptname.txt the lines
**********************************
wsl.exe –terminate WSLinux
wsl –shutdown
select vdisk file=%appdata%\..\Local\Local\Packages\SomeWSLVendorName\LocalState\ext4.vhdx
compact vdisk
exit
******************************************
Create a task in task scheduler with this action
diskpart /s PathToScript\scriptname.txt > logfile.txt
The problem with that approach is that it kills WSL on schedule.
If you don’t have a consistent time when you’ll never be using WSL (or leaving anything running in it), this command will interrupt and stop whatever you’re doing. I’d personally find that incredibly annoying. I also find I don’t need to shrink my disk down often, but that’s just my use case.
Great utility script!
Just have script run between at start of known wsl based process. using powershell script start compact, then run wsl script for process whatever. This wsl is always left in a running state.
I haven’t needed to do it again since, but you could use the Windows Task Scheduler to do it. I’ve instructions for using it for backups here: https://stephenreescarter.net/automatic-backups-for-wsl2/
That said, I’d be worried to do anything like this in an automated process, in case it triggers when I’m using WSL and it corrupts/loses data.
Cool, I will check it out. I linked this to the Urbit community so if you see an uptick of traffic that’s why. https://twitter.com/williamsbk/status/1268230307519528961
Awesome, thanks! ?
Thanks!
Isn’t it the same what “optimize-vhd -Path .\ext4.vhdx -Mode full” command does?
I’m not familiar with
optimize-vhd, but I just tried to run it and PowerShell can’t find the command. It may be a better alternative, but I’m guessing it comes as part of some optional extra package, so won’t always be available to users.Sadly, WSL doesn’t have a way to control the size of the vhdx virtual drive images. They grow uncontrolled way beyond the actual data contained. The diskpart, or Optimize-vhd commands require elevated rights and in some cases they can even grow the size of the drive, specially if you have done it after and `fstrim /` command.
So far the wslcompact script ( https://github.com/okibcn/wslcompact ) is the most efficient way to optimize the size. leaving a vhdx about 2% over the used space reported by df /
I think that command is for HyperV backend.
Just the thing I needed. I’d run into this problem once before when I deleted a large file and the space wasn’t freed from the virtual hard disk. But this time I wanted a fix and not a compromise(deleting the drive altogether and setting up my environment again). Thanks.
Very helpful, thank you!
Awesome, thank you so much !
I also had to run `wsl –shutdown` after terminating the Ubuntu distro.
Same here. Some part of WSL was hanging onto the file even though the distro was shutdown. `wsl –shutdown` closed down everything and allowed diskpart to proceed.
Great post, much appreciated!
You made my day,thank you mister
Thank you so mach!
I am grateful for your helpful post!
Thank you so much! This worked perfectly!
Thank you very much for this blog. It’s very helpfull.
I have just a question, after I followed this little tutorial, I can no longer access the WSL folder from windows. Yet WSL ubuntu is active as weel.
Do you know why ?
No, I’m not sure what would cause that, sorry. You could try exporting, deleting, and importing the instance, to see if that resets everything?
I have had this problem when I issue `wsl –terminate` while windows explorer is open and pointing to a WSL virtual folder. Restarting WSL after this does not bring back the ability to access WSL folders from Windows, but restarting my computer fixes everything.
Thanks for taking the time to post these instructions. They were exactly what I needed and worked like a champ. I appreciate that they were very clearly written and easy to follow. My situation was that I had installed Docker on Windows, and by default, my containers were writing data to /srv/docker/data/ which was inside the ext4.vxhd. This file was in my %appdata% folder on a small SSD C drive. Some overly verbose logging in a container ended up filling up the SSD and causing the host Windows OS to crash. I was able to move the data to a folder under /mnt/d on my physical D drive, change the config, and delete the excess log data from the /srv/docker/data directory, but I didn’t actually free that space back up on my SSD until I ran this instructions.
Thank you for your valuable article. In my case, I saved 4 GB(51GB -> 47GB) using this method without data corruption.
Thanks for the clear instructions. I had been looking for this for a while. Very helpful!
its working with docker data too, when you purge all image/volume data in wsl docker the vhdx keep the same size, you have to run this command to reduce his size
first, THANK YOU! for this. but am I the only one who got error returned: “The requested operation requires that the virtual disk be attached read only”?? took no more than 5 minutes to discover that after Selecting the Disk, I needed to `detach vdisk`. after that, worked without a hitch.
Thanks a lot. You were not the one 🙂
Thanks a lot. You were not the one 🙂
Thank you for adding this, just ran into the same error.
Thanks alot Stephen.. I followed your instructions and managed to free about 6GB of space…
It was helpful. Thank you
Thank you very much for this! Thorough and concise.
Thanks! I was wondering why `rm` doesn’t reduce the size. That’s the reason!
Thanks, that worked for me and shrank a 250GB disk to 150GB. WSL reports 75GB to be “used” (according to df -h), which is why I thought it could even shrink smaller, but 100GB more space is better than nothing 🙂
This was an excellent, easy guide to follow and use. I needed to migrate my environement to a new laptop, so this helped a lot.
I reduced my Ubuntu 18.04 WSL2 hard disk image file from ~250GB to ~79GB.
After that was finished, I then used the wsl.exe to export the .vhdx into a .tar file, with a final size of ~42GB.
wsl –export Ubuntu-18.04 C:\WSL2\2022-09-09-ubuntu-18.04.tar
Hi, you didn’t reduce a vhd, you compressed it.
when you make a decrease in the vhd, the OS, in this case Ubuntu, loses the ext4 partition and stops working with the error:
Ubuntu/Mint/Kali Boots to Initramfs Prompt in BusyBox
do you know how to solve this?
Thanks
Hi,
“you didn’t reduce a vhd, you compressed it.”
No, .tar files are not compressed; .tar.gz, .tar.bz2 and .tar.xz are.
For exporting, it wouldn’t make sense to produce a compressed file.
“when you make a decrease in the vhd”
What exactly have you done?
Thank you
Sadly, WSL doesn’t have a way to control the size of the vhdx virtual drive images. They grow uncontrolled way beyond the actual data contained. The diskpart, or Optimize-vhd commands require elevated rights and in some cases they can even grow the size of the drive, specially if you have done it after and `fstrim /` command.
For instance, you can see the actual data by typing `df /` inside your WSL distro. Maybe the wslcompact (https://github.com/okibcn/wslcompact) script can help you periodically compact the size of your installed distros without having to purchase a 2 TB drive. It leaves a size of about 2% over the used size reported by `df /`
Thanks a lot. Sir
Windows should do something about it.
Thank God someone has finally described a method that doesn’t use Docker, thank you for saving me from needing a new SSD, i gained 15 GB that were previously used from old fluid dynamics simulations I erased!
Thank you Sir for the great post!
Thanks! from 196.4 GB to 53.7 GB. Huge improvement.
Thank you for this. ImageMagick went postal and caused the WSL vdisk to expand out of control to the point Windows was nearly dead for lack of storage.
I was able to use the info you shared to reclaim 140G of unused space.
All the above didn’t work for me because I needed to defragment WSL vdisk first. I found a way, feel free to check it out: https://github.com/bendover94/reclaim_wsl_mem
Thanks Stephen.
That recovered me 40GB on a disk that was almost full.